Easy D.I.Y. Home Recycling Center
 We are lucky enough to live in a township where recycling is picked up at our house weekly. Up until last week, we've used the area of our garage right outside of the kitchen door to store our recycling in between pick-ups. To be honest- this area has been an eyesore. We basically just used a trash can, a cardboard box, and a basket to collect our recyclables. Anything that didn't fit into these containers just got placed somewhere nearby until recycling day. It looked pretty bad. Take a a look at these "before" pictures:
Here are the materials I used to create a more organized home recycling center: 4 wooden crates (I found them on sale for around $8 each at Joanne's), 4 tubes of brightly colored paint (I had to go back to the store to buy a second tube of each), a paint brush, and some alphabet stencils.
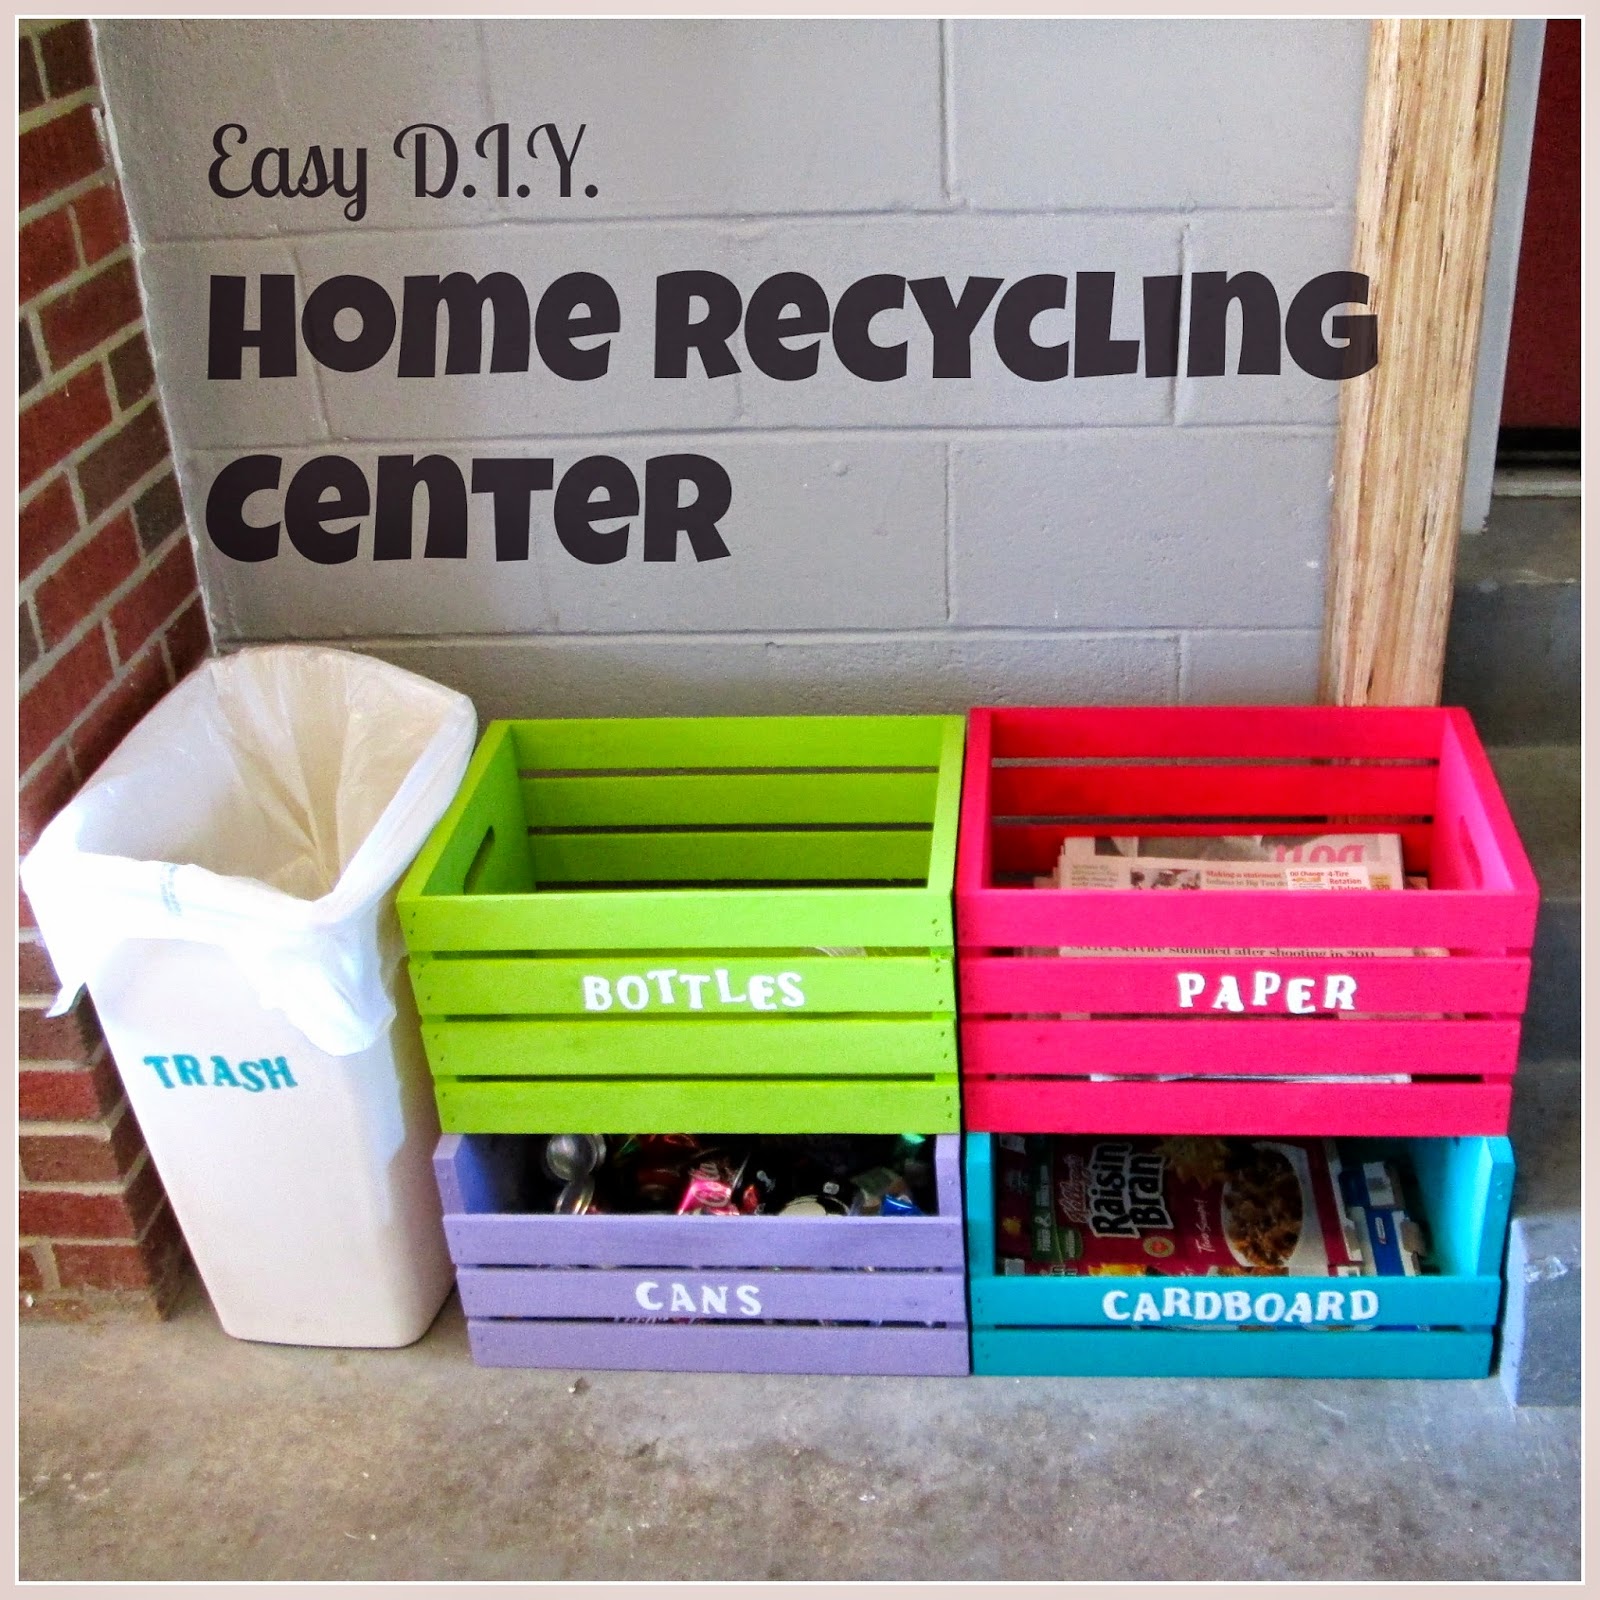
Then, I painted each crate a different color and used the stencil to label each one. I decided to make one crate for bottles (and jars), one for paper, one for cans, and one for cardboard. For the two crates on the bottom, I carefully used a hammer to remove one or two slats for easy access. Finally, I used some extra paint to label my trash can. Here was the result:
I couldn't wait to start to use my new home recycling center!
Here's one more before and after shot:
Hopefully, I've given you some ideas to think about. Happy organizing!
We are lucky enough to live in a township where recycling is picked up at our house weekly. Up until last week, we've used the area of our garage right outside of the kitchen door to store our recycling in between pick-ups. To be honest- this area has been an eyesore. We basically just used a trash can, a cardboard box, and a basket to collect our recyclables. Anything that didn't fit into these containers just got placed somewhere nearby until recycling day. It looked pretty bad. Take a a look at these "before" pictures:
Here are the materials I used to create a more organized home recycling center: 4 wooden crates (I found them on sale for around $8 each at Joanne's), 4 tubes of brightly colored paint (I had to go back to the store to buy a second tube of each), a paint brush, and some alphabet stencils.
Then, I painted each crate a different color and used the stencil to label each one. I decided to make one crate for bottles (and jars), one for paper, one for cans, and one for cardboard. For the two crates on the bottom, I carefully used a hammer to remove one or two slats for easy access. Finally, I used some extra paint to label my trash can. Here was the result:
I couldn't wait to start to use my new home recycling center!
Here's one more before and after shot:
Hopefully, I've given you some ideas to think about. Happy organizing!
Laura Beth

 We are lucky enough to live in a township where recycling is picked up at our house weekly. Up until last week, we've used the area of our garage right outside of the kitchen door to store our recycling in between pick-ups. To be honest- this area has been an eyesore. We basically just used a trash can, a cardboard box, and a basket to collect our recyclables. Anything that didn't fit into these containers just got placed somewhere nearby until recycling day. It looked pretty bad. Take a a look at these "before" pictures:


